Landmark Sat Install Questions

GlenStMary

Well-known member
Okay, I'm totally confused about installing a Winegard Traveler SWM dish and hope someone out there with the same dish on a Landmark can answer some of my questions.

First, I have a 2013 Key Largo.

Second, I've investigated just about everything on the owners forum and other sites about satellite installs, problems, etc. I have looked at pictures of many of the installs and I still have questions.

Third, I've even called Heartland customer service several times and haven't gotten any closer to getting the dish installed.

Okay, now for my questions...

1. Location of cables in roof
I was told by Anthony at HL that I would find the pre-installed cables for the Winegard controller and the coax under one of my speakers in the bedroom. That was not the case. I found a drawing on this site of the coiled cables 22" from the front AC vent. Ah, getting closer I thought. Well, I toned out the coax cable end in the UDC and found it about 1/2 the way across the bedroom ceiling. I went up on the roof and tried to locate the tone from there and found a very weak signal about 1/2" from the back of my AC cover. I asked Anthony whether the cable was on top, or below the foam. He didn't know. I'm guessing it is below the foam since the tone was so weak.

2. Length of cables in roof
I asked him how much cable was coiled up there since when I start digging around in the foam looking for that cable the less up there the more chance of me missing it. He guessed they put a foot or so up there.

3. Dish Mounting Location
I also asked where the factory normally mounted a dish since while measuring between the AC housing and the bathroom vent I don't have the necessary 33" of clearance Winegard requires. I'm thinking the best place to mount the dish is right in front of the front AC.

4. Cable Terminations
With that in mind, and the 1 foot estimated cable lengths I then asked about what kinds of ends the cables are terminated with, if any. The reason I asked that was because the dish comes prewired with 30 foot of controller cable with that funky end on it and if the plant uses a Winegard extension cable I don't have to find and repin any cables.

5. Typical "Key Largo Dish" Mounting Location
My questions are... where is the dish normally mounted on other Key Largos, where are the cable coils in the roof, and how far down into the foam do I need to dig around to find them. I don't want to put any more holes in the roof than necessary and I don't want to take it to a dealer for the install.

Besides the almost $600 price I've been quoted by several dealers for the install they also said they would normally drop the bedroom ceiling to find the cables. That all sounds too extreme. Please forgive the length of this post, I'm not a Twitter proponent and I'm really interested in doing this install correctly.:confused:
 
Last edited by a moderator:

jbeletti

Well-known member
...Please forgive the length of this post, I'm not a Twitter proponent and I'm really interested in doing this install correctly.:confused:

Hi Glen,

No worries on the length of the post. What does the Twitter comment mean though? :confused:

I don't have many specific answers for you just yet. Sorry about that. I can tell you that the factory does not install satellite dishes, so service won't have a frame of reference for that. They should be able to confirm how the coach is prewired however. And that is what I might be able to help you figure out.

I see you have already figured out the answers to some of your concerns. Please reply with which numbered question above you still need help on.
 

GlenStMary

Well-known member
Thanks Jim for making my original ranting post much clearer. I deleted my second post since you made my questions much clearer to understand. I'm hoping some other Landmark owners can offer up some information about their installs, and those, combined with what you may be able to find from the factory team, will make this install clean and without problems. I know you will understand my desires to drill as few holes in the roof as necessary, or to not remove any more of the foam insulation than is required, and to make the wiring as clean and trouble free as is possible. So far, I still would like answers to the following questions... #1, #4, & #5. Thanks
 

jbeletti

Well-known member
Glen,

With regard to 1, do you have bedroom ceiling speakers? If so, have you removed the speaker that is rear-most and straight across from the TV antenna crank? If you have not yet removed this speaker, please do so as I feel it will answer questions 1 and 4.

With regard to 5, I can ask kakampers to share where they had theirs installed. I can also look for a picture of where mine was installed on my Key Largo. I'd also like you to print the page from the Winegard install manual and go up on your roof to measure out just what you options are, given the clear space requirement by Winegard.
 

jbeletti

Well-known member
Found it! Bear in mind, mine is on a 2012 Key Largo. So there could be some variations.

Items to note from this image:
  • I have 4 coax cables - you will likely have 2 in the roof but only need 1. This install was for a non-SWM dish
  • My coax cables enter the roof, directly across from the TV antenna, above a speaker in the bedroom ceiling
  • The black cable is the control cable that goes to the Winegard interface box. Looks like mine is attached to the roof and goes forward. Where it enters the RV, I am not sure. I no longer have this RV to check

Winegard Trav'ler on 2012 Key Largo.jpg
 

GlenStMary

Well-known member
I have removed the speakers as Anthony suggested and found nothing. I even toned both locations by probing into the foam around the speakers but found nothing. Next, I found on this site a diagram from 2012 indicating the cables were coiled in the roof 22" behind the front AC vent. I again used a toner and found a good tone near the center of the bedroom ceiling. I then went up on the roof expecting to get a good tone somewhere about 22" behind the front AC vent but got only a really weak signal under the back of the AC cover. That led me to believe the cables may be coiled up under the AC housing and buried under the foam directly against the bedroom ceiling.
 

GlenStMary

Well-known member
I have not received a good tone signal anywhere near either speaker. However, I do get a good tone in the center of the bedroom ceiling slightly forward of the TV antenna crank. That should put me at the back of the AC housing. When I go up on the roof to find the tone I get a very weak tone just under the back edge of the AC housing. I guess I'll try to pull the AC duct vent covers and while using a mirror, try to see if I can get a strong tone from either side. That should point me more in the proper area. Since I'm not getting a strong return tone from up on the roof, I assume the cables are buried deep into the foam. That will make it more difficult to find without making a bigger hole than I planned. Looking at your picture I notice two things. First, the hole in your roof for cable entry appears to be almost 2". I may have to go that large if I have trouble finding those cables. And also, it appears your old roof had about as much room between the AC housing and fan vent cover as I do. According to the Winegard install notes I need 33" of clearance from the center of the dish mount to any obstacle taller than 10". I don't have that much room and it doesn't look as though your install did either. Did you ever have any problems with the dish hitting the AC or vent? I'm leaning toward installing my mount just forward of the AC housing where I have tons of room and I can't think of any reason that would not make that a good location.
 

kakampers

Past Heartland Ambassador
We have a 2013 Key Largo. Our dish was mounted in virtually the same place and position as the picture above, but a little farther away from the antenna (further right in the pic). Not sure about the location of the wiring....we had the dealer mount our Travler which we removed from our Bighorn....they apparently had no problem finding the wiring.
 

jbeletti

Well-known member
...According to the Winegard install notes I need 33" of clearance from the center of the dish mount to any obstacle taller than 10". I don't have that much room and it doesn't look as though your install did either. Did you ever have any problems with the dish hitting the AC or vent? I'm leaning toward installing my mount just forward of the AC housing where I have tons of room and I can't think of any reason that would not make that a good location.

I never had an issue, using it where it was installed. I have seen a lot of dishes installed in front of the front most AC unit. I like that area because it can give a better chance to see the satellites as there's usually not a tree right at the front corner of your site but most often, there is one a bit further back. In those cases, I always pull my RV as far forward as I can, so the front cap is "just" off the road, then I park the truck behind the RV. But with the dish mounted all the way up front, I'd have even more flexibility.
 

murry135

New York Chapter Leaders - retired
Glen,

We have a 2013 Key Largo our cables are located behind a rectangular blank electric plate on the bedroom ceiling. Remove plate and the wires are tucked up there, a small coil of non terminate wires should be found.

Jim
 
Last edited:

GlenStMary

Well-known member
Thanks Jim,
I have no electric plate on the ceiling. That would have been too easy. I have only the TV antenna crank, 2 speakers, 2 AC input vents, 2 AC output vents, and the smoke alarm. There doesn't seem to be much continuity between units, even from the same models and year of manufacture. That is why I've been so careful before drilling any holes. However, I now have thought it all out and decided which way I will go. I'm going to install the dish right in front of the forward AC unit since there are no obstacles close by, and Jim Belletti has reinforced my thoughts about the advantage of having the dish on the front of the roof. I will drill a small hole alongside the existing vent pipe for the washer and feed the Winegard provided cables down into the washer closet. I can then go down along the floor with the washer waste pipe and into the storage compartment with the coax where it will easily terminate in the UDC. The controller cable will be run along the top inside rail of the closet over to the shelf below the safe where I have power and a place for it to be sit. This way I don't have to fish around in the roof for anything and won't have to worry about what kinds of cable ends I have, etc. Thanks so much for everybody's input on this, especially Jim for digging up the photo and making my original post so much clearer. Everyone have a great holiday and stay safe on the road, or wherever you are.
 

brianharrison

Well-known member
I have an older Landmark (2011) and my cables were also in the ceiling, behind the bedroom TV where the TV booster plate/coax connection is located in the ceiling (Figure 3 in the link shows front of the plate). My over the air TV antenna cable was also in this location. I used a toner to trace cables back to the UDC and living room entertainment connections.

Incidentally, my winegard Trav'ler is located on the rear of my unit (above living room) and cables run across the roof and directly down into booster plate location behind the TV.

Brian
 

GlenStMary

Well-known member
Thanks Brian,

Your location to would have made this install more straightforward. I've decided to not use the pre-wired cables and use what I got with the Traveler dish. That way I know exactly where they are located, where they are fed through, and what connections are made. I've taken off some of the coverings over the factory installed drains and I have found a clear shot to the UDC. That seems to be a shorter, more direct approach for this. All in all I'm getting more familiar with our coach as well as saving the $600 on the installation
 

GlenStMary

Well-known member
The Winegard Traveler is installed and working very well. I ran the cables down through the roof right next to washer's vent stack and that only required a 5/8" hole for both cables. The control cable supplied with the dish was run along the front moulding of the closets across to the mirrored compartment with the safe where the controller is installed. The coax was run down alongside the washer vent pipe and down into the storage compartment. From there I followed the existing cables route to the area behind the storage back wall. I removed the HL installed cable for the rooftop dish from the UDC faceplate and hooked the new one in. The unit works and looks great, I know where everything is in case I ever have problems with it, I only have a few very small holes in my roof, I saved about $ 600 and probably several days not having the coach, and it only took me about 2 1/2 hours to accomplish.

Thanks to all that answered my questions. I was worried I could cause more problems than necessary without really thinking this thing through and getting some input from the group.
 

brianharrison

Well-known member
Glad it all worked out and you saved some dollars. A few pictures of the installed wiring etc would be nice to help others considering the same DIY.

Brian
 

jbeletti

Well-known member
Great report Glen. Not only did you save $600, but like you said, you know how everything is run and done, plus you likely learned more about your coach. Great job. Time to enjoy.
 

murry135

New York Chapter Leaders - retired
Yep waiting for picks of antenna location for my install. Front of AC seems logical as long as roof is sturdy enough. Hate the thought of running exposed wires along roof top but I guess that is the way it is done.
 

GlenStMary

Well-known member
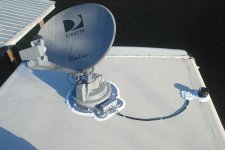
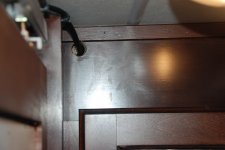
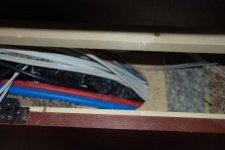
Here are some pictures of my Traveler install. The cable route was straightforward, easy to accomplish, and I was able to use the cables supplied with the dish. I have about 10' of the controller cable coiled up in the mirrored cabinet in the wardrobe closet and I had about 2' of the coax I had to tie down after I connected it to the wall plate in the UDC where HL had terminated their rooftop cable. The first picture is of the rooftop.DSC_1627.JPG

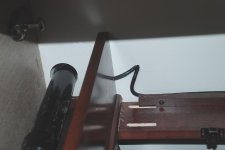
I brought the cable down next to the vent for the washer drain. I only had to drill a 5/8" hole for both cables. That allowed me to bring the cables into the bedroom closet. You can see I split the cables off so that the control cable headed over to the mirrored cabinet on the inside of the frame, and the coax headed down with the drain pipe into the storage bay.
DSC_1611.JPG
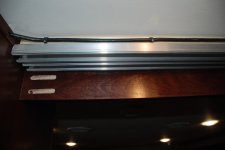
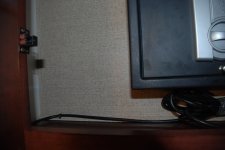
I used cable management holders to keep the controller cable attached to the closet frame all the way to the mirrored cabinet.
DSC_1614.JPG
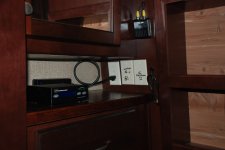
I drilled a couple of 3/4" holes in the mirrored cabinet, one in the face frame and one in the bottom to allow me to run the control cable into the cabinet and down to the shelf below.
DSC_1615.JPG The excess controller cable is placed between the safe and the cabinet wall. The cable extends down to the shelf where the controller sits along with the power supply.

DSC_1616.JPG
This picture refused to change to a vertical format so be aware of that when viewing it.

DSC_1620.JPG
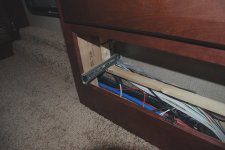
Then I ran the coax down into the floor of the closet and into the chase over to the dresser with all of the other wires and the washer drain pipe. This also gave me a chance to clean up and secure all of the wiring that was there from the manufacturing process.
DSC_1621.JPG From there it is an easy run down into the storage bay with all of the other wiring. DSC_1622.JPG

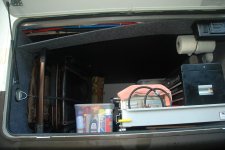
Once down into the storage bay I just removed the narrow strip of covered wood on the top edge of the storage door and secured the coax along with the other wires to the washer drain runningto behind the storage bay back wall.
DSC_1623.JPG
Once behind the wall it was easy to attach to coax to the ceiling in the compartment, run it over to the back of the UDC compartment where I replaced the HL factory cable on the SAT faceplate with my cable from the roof and voila. I feel much better knowing where everything is and if necessary I think this would be much easier to troubleshoot. It also gave me the opportunity to see how many of the other cables, wires, and plumbing was run.

I hope this may be of help to someone else pondering a Winegard install of their own. At least it may give someone some extra impetus to save the installation money now that you can see how easy the process is. I had two dealerships tell me this was a 6 hour job. The whole process took me a little over 2 1/2 hours of work (not counting the 3 or 4 days it took trying to validate the location of the HL pre-wiring, which I did not use, and getting up the courage to drill that hole in the roof).
 

brianharrison

Well-known member
Looks great! I did not see if you have installed the "roller plate" for the dish wheel to rest on when it is stowed. It is not mandatory, but I installed one after the fact once I saw the rubbing/movement on the roof material due to shaking as I drove down the road.

Something to watch for and consider.

Brian
 
Top