Reico-Titan Ground Control System

JohnDar

Prolifically Gabby Member
For anyone buying the Reico-Titan system, be sure to check the date of the instruction manual it comes with against the one on their website. There has been a change between the one I got, revised 11-29-10 and the one now on their website, revised 02-17-11. One item in particular is checking the bolt torque. In the earlier version, it says to torque to 100 ft-lbs. The first bolt I did that on snapped in two, so I just took the rest to "hand wrench" tight without using gorilla strength. If that had been a self-tapping bolt into the frame, it would not have been pretty. In reading the newer version, it has been changed to 75 ft-lbs, which is probably at or a bit higher than where I took them. I'll check the torque on them tomorrow, weather permitting. They also detail not to mount the rear jacks more than 18" from the rear spring hangers and have drawings in the manual for mounting both styles of brackets.

I just found this a few minutes ago by accident after visiting their site and pulling up the installation manual.
 

JohnDar

Prolifically Gabby Member
To follow up on the bolt torque specs, I did get back to the rig and try tightening a couple more of the low carbon ASTM 307A 3/8-16 x 1 1/2" bolts to 75 ft-lbs. Snapped two more before I got even close. Decided to go back to being junior metallurgist and looked up the recommended torques for that bolt. 20 ft-lbs. I contacted Reico and Sonny and was told he had tested them to 200 ft-lbs with no failures. I find that questionable. Sonny said he would check with the bolt supplier. In addition, the ones I received have longer shoulders (1/2") than the extra ones I purchased from a local fastener company. Having broken three of the supplied bolts, I decided not to tempt fate and try torquing the ones I bought to the 75 ft-lb level.

I have not heard back from Sonny, but in the meantime, I've purchased a supply of Grade 8 bolts with zinc dichromate plating, not the plain zinc of the original bolts. Max torque spec for these is about 47 ft-lbs, so I'll run them just under that. And the shoulders are only 3/8" long, so there should be no problem with running out of threads before the nuts are fully tightened. For those who might consider using stainless steel bolts, be sure to check the torque specs for those. My preliminary research shows them to be specified at a lower torque than the medium carbon Grade 8's.

By comparison, the 1/2" diameter bolts that hold my trailer hitch together are only spec'd to 75 ft-lbs. so it's highly unlikely that a 3/8" bolt would tolerate that. And yes, I checked several references and none of them put the ASTM 307A bolts over 20 ft-lbs.
 

slmayor

Founding California Northern Chapter Leader
I know that Ray snapped a couple off as well, then went over to the hardware store and got different ones. We did mention this to Sonny when we saw him in Elkhart, and they were using some of their bolts when they remounted my bracket they fixed, and Sam torqued them to their recommended specs. They didn't break, so we both may have got some bolts from a different batch I suppose. I know there have been a couple supply-side issues for these guys.
 

JohnDar

Prolifically Gabby Member
It may not be related, but there was a major problem many years ago with Chinese counterfeit fasteners making it into the supply chain. Once upon a time, I did work as a QC metallurgist.
 

dieselengineer

Charter Member
The Reico is a great system. Easy to install and operate. I always go by the bolt torque on the rated bolt chart not by the installation papers provided with the equipment. Fast and easy to use, and the great thing is the ability to raise and lower the pin while in the truck during the hooking up process. Keep your drill bits sharp (drill doctor) and the installation is a piece of cake! Also, the temperature appears not to effect the system, so once the jacks are set, they do not move or make bumping noises as time goes by. Great system.
 

JohnDar

Prolifically Gabby Member
Even with the bolt snafu, I'm still confident that I made the right choice. Removing the low grade bolts and installing the Grade 8's was made much easier since I purchased an 18V Bosch drill/impact driver combo set in the interim. Way easier than trying to wrestle two wrenches in a contorted position. All bolts are now at 42 ft-lbs. With a break in the weather, the front jacks will be installed by Saturday and all wired up.
 

JohnDar

Prolifically Gabby Member
Re: Reico-Titan Ground Control System: Installation Complete

Well 98% anyways. Only thing left to do is modify the existing jack switch housing to accommodate the little panel that goes with the Ground Control. Not a big deal since the main control box has the same jacks and power switch on it. I mounted the control box on the forward basement wall, next to the rear of the propane cabinet. Getting the front jacks installed was much easier than the rear jacks (no holes to drill). I just set one of my extra cribbing pads in the compartment, with a rubber pad on it, and spent the day sitting in there working.

I operated all four jacks with the remote and everything works as advertised. I even reconnected my Ultra-Fab stabilizers to the new front jacks. I was going to re-use my elephant feet, rather than the pads that are supplied, but after some consideration decided not to. Especially since the weight of the trailer had deformed the retainer pins and elongated the holes in the pads. That and the fact that they don't have any pivoting ability, like the R-T pads do.

I also took time to put the sensors for my TST system on the trailer tires. Seemed to work, but it kept showing the tire readings all the way home...10 miles from the trailer. I'll have to figure that out. Next job is to mount the reinforcing panel for the living room TV bracket, and then install the motion sensor light over the door. Dewinterize the plumbing, load up some gear, and pull it up to our seasonal site late next week.
 

Ray LeTourneau

Senior Member - Past Moderator
Re: Reico-Titan Ground Control System: Installation Complete

I also took time to put the sensors for my TST system on the trailer tires. Seemed to work, but it kept showing the tire readings all the way home...10 miles from the trailer. I'll have to figure that out.
John, the TST receiver will hold and display the last reading it received until it's shut down. Once you turn it off it will reset.
 

JohnDar

Prolifically Gabby Member
Re: Reico-Titan Ground Control System: Installation Complete

Thanks, Ray. I've been playing with it on the fly and haven't really deciphered the manual yet. But, before I put the sensors on, I used a tire gage on the tires. Sensor readings agreed with it.
 

JohnDar

Prolifically Gabby Member
Re: Reico-Titan Ground Control System: Installation Complete

I've figured out how to mount the exterior switch panel in place of the original one. Just need to remove about 1/16" from either side of the new panel and make the opening a little larger in the enclosure. Rather than use screws, double sided tape it in place and it will be a done deal. Need to take it to my belt sander after dinner.

Managed to get the new motion sensor light mounted over the door and the living room TV mount panel is now in place. I'm about done with add-ons for this season, I think. Couple of other little things to do, but the big stuff is done.

I figured out how to turn off the TST display without wiping everything out. And I played with the Ground Control jacks a bit more, just for fun.
 

dieselengineer

Charter Member
John
You are on the mark, just remove some material on the reico switch and it fit right into the original switch holder. I ran mind across the table saw and redrilled the hole and it looks like factory. What height did you set the rear jacks in the retract position?
 

JohnDar

Prolifically Gabby Member
Jim, the rear jacks are about 8" off the ground, retracted. But my parking spot at the storage yard is a bit uphill, so it may well be less once it's leveled. At any rate, I like to put one of my cribbing pads under the feet when I set up camp,anyways, so the travel will be considerably less. Visually, they are just a tad below the spare tire hanging under the rig.
 

slmayor

Founding California Northern Chapter Leader
Ours are just above the scrubline of the tires. A hair above the bottom of the tire rim visually. They look low, but 6200 miles, countless driveways and turns and we've not hit them yet. With the position of the mounts as close as they are to the wheels, it would be tough to drag them I think.

Everytime I don't have to drag out the orange blocks, they make me smile... :)
 

JohnDar

Prolifically Gabby Member
You would almost need to be doing wheelies with the trailer to drag them. Probably hit the rear cap first. I use the wooden pads I made because our seasonal site is dirt and they spread the load a bit. Someone also wrote a while back that the less you extend your jacks, regardless of type, the more stable the coach will be. And I put a section of 2x12 under each tire.

I've got two sets of the orange blocks and one of the yellow ones. They may need to find another home. I've also got a set of gently used front jacks available, along with a Lippert 1621HD pin box. Looking at the motor, though, it looks a lot like the one on the rear stabilizers. Might be good to keep as a spare if it can be used back there.
 

dieselengineer

Charter Member
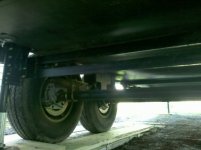
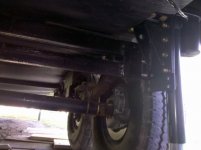
To add to the fun of having a leveling system, I design and fab a set of channel iron to add additional side to side bracing. Now the old camper in rock solid. This reinforcing adds to the OEM I beam frame and gives a real nice solid foundation. The slides operate real smooth, great upgrade. I highly recommend added this. Attached are some pix of the patent pending design

. IMG_20110505_180401.jpgIMG_20110505_180354.jpg
 

truknutt

Committed Member
To add to the fun of having a leveling system, I design and fab a set of channel iron to add additional side to side bracing. Now the old camper in rock solid. This reinforcing adds to the OEM I beam frame and gives a real nice solid foundation. The slides operate real smooth, great upgrade. I highly recommend added this. Attached are some pix of the patent pending design

. View attachment 13058View attachment 13059

The only issue I have with this system is that you haven't installed it on my Cyclone, YET!!!
 

slmayor

Founding California Northern Chapter Leader
To add to the fun of having a leveling system, I design and fab a set of channel iron to add additional side to side bracing. Now the old camper in rock solid. This reinforcing adds to the OEM I beam frame and gives a real nice solid foundation. The slides operate real smooth, great upgrade. I highly recommend added this. Attached are some pix of the patent pending design

. View attachment 13058View attachment 13059

Awesome job. That's on our "to do" list, now that the sun has finally came out. I'd be happy to do some design testing for you with our trailer, but maybe not until fuel prices come down a little... :)
 

circusbear

Active Member
Hey guys. We got out system mounted on our 3250 last weekend. Went pretty well with the only real issue was trying to get the tie bar from the original jack undone. There wasn't much room on the top of the off door side to run a wrench. I replaced the supplied fasteners with grade 8 bolts after I twisted one of theirs off with my 3/8 drive ratchet. The system works well and really makes the trailer rock solid.
 
Top